
Why make a silicone mold for beads?
Silicone is an ideal choice for mold making because of its many advantages. You can easily create silicone teether beads wholesale using silicone molding. The molds themselves are also very durable, so you can use them repeatedly without worrying about breakage. Compared with rubber, the inorganic composition of silicone makes it highly resistant to heat and cold, chemical exposure and even fungi.
Today, many industries rely on silicone molding. Product developers, engineers, DIY manufacturers, and even chefs all make silicone molds to make one-time or smaller batches of parts.
Some of the benefits of silicone molds include:
flexibility
The flexibility of silicone makes it easy to use. Compared with harder materials such as plastic, silicone molds are flexible and light, and they are easier to remove once the part is fully formed. Due to the high flexibility of silicone, both the mold and the finished parts are unlikely to crack or chip. You can use custom silicone molds to shape everything from complex engineering parts to holiday-themed ice cubes or candy.
stability
Silica gel can withstand temperatures from -65° to 400° Celsius. In addition, it can have an elongation of 700%, depending on the formulation. Highly stable under a wide range of conditions, you can put silicone molds in the oven, freeze them, and stretch them during removal.
Common applications of silicone molds
Hobbyists and professionals rely on silicone molds because of their versatility and ease of use. The following are some examples of industries and applications that use silicone molds to produce products:
Prototyping
Silicone molding is used in prototyping and product development and production in various industries. Since the cost of silicone molds is much lower than that of hard molds in traditional manufacturing processes such as injection molding, casting in silicone molds is very suitable for prototype product design and the creation of Beta units for testing the market and consumers' reactions to new products. Although 3D printing is more suitable for quickly creating disposable parts, silicone molding and polyurethane casting may be ideal for small batches of parts.
Jewelry
Jewelers use custom silicone molds to replicate hand-carved or 3D printed patterns in wax, allowing them to phase out the time-consuming work of creating wax patterns for each new piece, but continue to use wax for casting. This provides a major leap for mass production and makes it possible to scale up investment casting. Since silicone molds can capture fine details, jewelers can create works with gorgeous details and complex geometric shapes.
consumer goods
Creators use silicone molds to make many custom crafts, such as soaps and candles. Even manufacturers of school supplies often use silicone molds to make items such as chalk and erasers.
For example, Tinta Crayons, a small company based in Australia, uses silicone molding to make crayons with playful shapes and high surface details.
food and drinks
Food-grade silicone molds are used to make all kinds of whimsical candies, including chocolate, popsicles and lollipops. Since silicone can withstand heat up to 400 degrees Celsius, the mold can also be used for cooking. Small baked goods such as muffins and cupcakes can be formed well in silicone molds.
DIY project
Independent artists and DIYers often use silicone molds to make unique works. You can use silicone molds to form or replicate everything from bath bombs to dog treats-the possibilities are almost limitless. An interesting silicone molding project for children is to make life models of their hands. Just make sure you choose silicone that is safe for your skin.
How to make silicone molding patterns
The pattern (sometimes called the master) is the part you use to make an accurate negative in the silicone mold. If you are just trying to copy an existing object, it might make sense to use that object as your pattern. You just need to make sure that the object can withstand the mold manufacturing process.
Once you have the pattern, you can start making silicone molds.
One-piece and two-piece silicone molds
Before you start making a mold, you need to determine the type of mold you want to make.
The one-piece silicone mold is like an ice cube tray. You fill the mold and then let the material solidify. However, just like ice cube trays make cubes with flat tops, one-piece molds are only suitable for designs with flat sides. If your master has a deep undercut, once the silicone has solidified without damage, it will be more difficult to remove it and the finished part from the mold.
When your design doesn't care about these, the one-piece silicone mold is the ideal way to create a seamless 3D replica of the master on all its other surfaces.
Two-piece silicone molds are more suitable for copying 3D masters without flat or deep cut edges. The mold is divided into two parts and then reconnected together to form a fillable 3D cavity (similar to the working principle of injection molding).
Two-piece molds have no flat surfaces and are easier to use than single-piece molds. The downside is that they are a bit complicated to create, and if the two pieces are not completely flush, a seam may form.
How to make a one-piece silicone mold
Building the mold shell: Coated MDF is a popular choice for building silicone mold seal boxes, but even simple prefabricated plastic containers will work. Look for non-porous materials and flat bottoms.
Lay out the master and apply the release agent: first use the release agent to lightly atomize the inside of the mold shell. Lay the detailed side up on the master in the box. Spray these lightly with release agent. It will take about 10 minutes to dry completely.
Prepare the silicone: mix the silicone rubber according to the package instructions. You can use a vibrating device such as a hand-held electric sander to remove air bubbles.
Pour the silicone rubber into the mold shell: Pour the mixed silicone rubber gently into the sealed box with a narrow flow. First aim at the lowest part (bottom) of the box, and then gradually the outline of the 3D printed master will appear. Cover it with at least one centimeter of silicone. The curing process can take from one hour to one day to complete, depending on the type and brand of silicone.
Demoulding silicone: After curing, peel off the silicone from the sealed box and remove the master. This will be used as your ice cube tray mold for casting your end-use products.
Cast your part: Again, it is a good idea to lightly spray the silicone mold with a release agent and let it dry for 10 minutes. Pour the final material (such as wax or concrete) into the cavity and allow it to solidify. You can use this silicone mold multiple times.
How to make two-piece silicone mold
To create a two-part mold, follow the first two steps above to start, which includes creating a master and building a mold shell. After that, follow the process below to create a two-part mold:
Lay out the master in clay: Use clay to form which will eventually become half of the mold. The clay should be placed inside your mold shell so that half of your master sticks out of the clay.
Prepare and pour the silica gel: Prepare the silica gel according to the packaging instructions that came with the silica gel, and then gently pour the silica gel into the clay and the mold shell on top of the master. This layer of silicone will be half of your two-piece mold.
Remove everything from the mold shell: Once your first mold is cured, you need to remove the silicone mold, master and clay from the mold shell. It doesn't matter if the layers are separated during extraction.
Remove the clay: Remove all the clay to expose your first silicone mold and master. Make sure your master and existing molds are completely clean.
Put the mold and master back into the mold shell: Insert the existing silicone mold and master (placed in the mold) face up instead of down into the mold shell.
Apply mold release agent: Apply a thin layer of mold release agent on the top of the master mold and the existing silicone mold to make the mold release easier.
Prepare and pour the silicone for the second mold: Following the same instructions as before, prepare the silicone and pour it into the mold shell to create the second mold.
Wait for the second mold to cure: Allow enough time for the second mold to cure before attempting to remove the second mold from the mold shell.
Part demolding: Take out the two silicone molds from the mold shell, and then gently pull them apart.
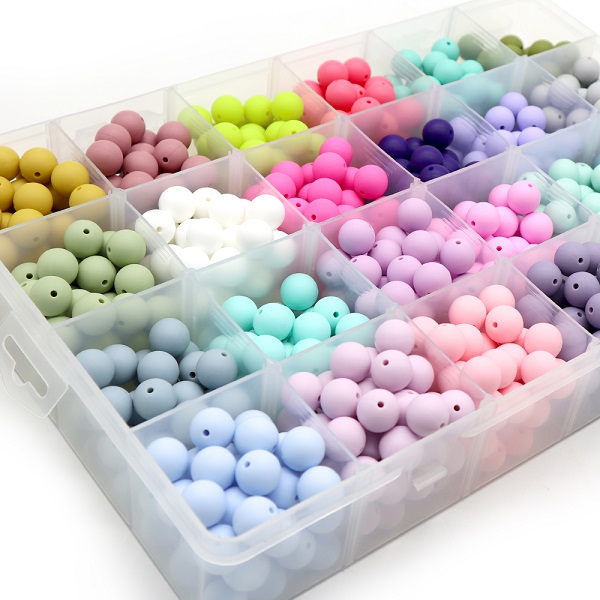
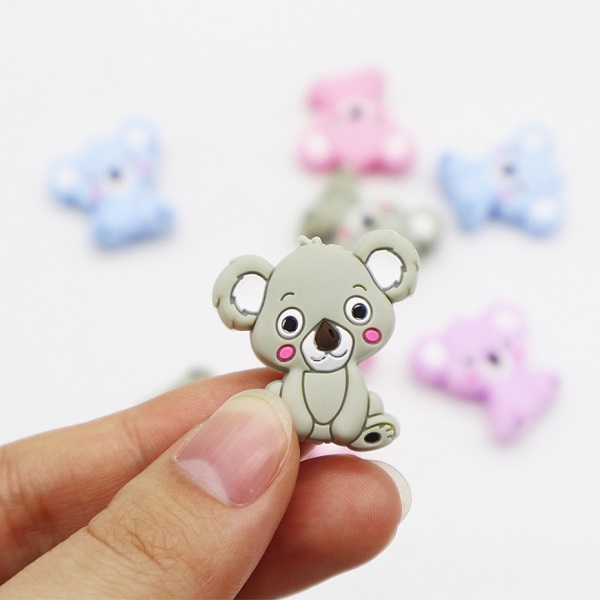
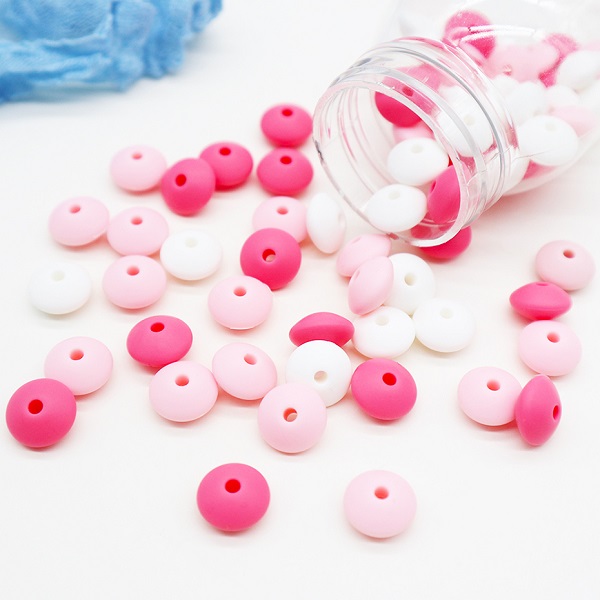
Melikey wholesale food grade silicone beads. Safe for babies. We are a silicone beads factory for over 10 years, we have rich experience about silicone teething beads wholesale.
Post time: Jan-06-2022